A P5b Rover. 3.5litre V8 coupe.

A rolling restoration,repairs,servicing and using as a daily driver.


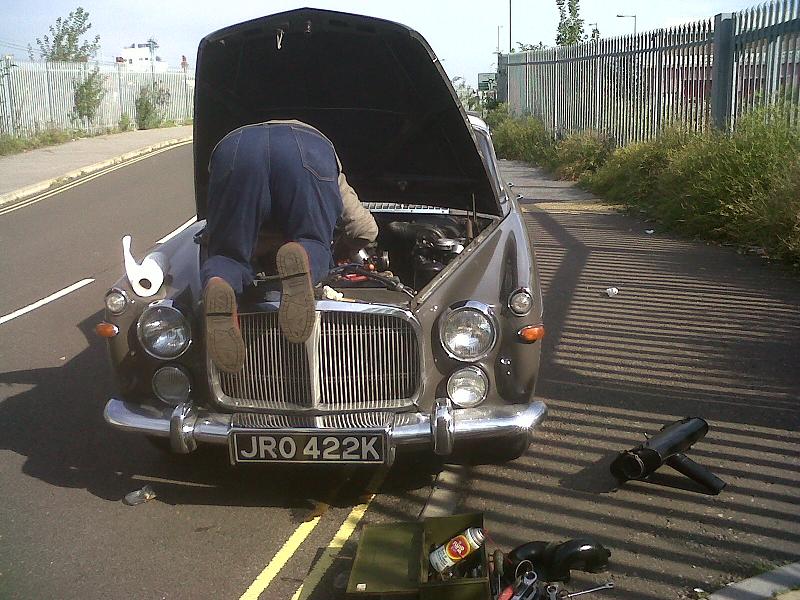
I have owned this car for years,its no show winner I wanted it to look original and not over restored.Most work was done outside and as a running resto.

I am always interested in buying spares to use or swap etc,I still have some tools etc to clear.

The P5b history..Considered by some classic car enthusiasts the last of the 'real' rovers and often called the poor mans Rolls Royce,the Rover P5b and P5 were both made as saloons or coupes. Originally launched in 1958 as the P5, the cars were fitted with a three litre six cylinder in line engine with over head inlet and side exhaust valves,an engine basically carried over from the P4 series (Rover 90,100,105 etc) . The P5 series cars ran to three versions MK1,2 and 3 each version being updated and improved on its predecessor,eventually the P5 was replaced by the P5b, updated with Rostyle wheels,built in fog and spot lights the orginally Buick designed alloy V8 engine (modified by Rover) and a Borg Warner type 35B automatic gear box. Both the P5 and P5b versions have torsion bar front suspension,a front sub frame but no chassis. All but the very early cars have disc front brakes,all have drum brakes on the rear with a solid axle on cart springs.Long after production ceased in 1973 they remained popular for their essentially old fashioned British character and today attract quite high prices with a dedicated band of enthusiastic owners.The essential character of these cars,which they share with the earlier P4 series is that of a heavy,solid and well put together vehicle, in some areas over engineered and complex, they were assembled largely by hand. It is often said that build quality got worse towards the end of their run as Leyland took over from Rover.When new they were regarded as an expensive,quality vehicle often used as ministerial cars,but now even their most ardent admirers will admit that they now show a capacity to rust especially in areas normally unseen.When new they were compared to the large Humbers,Jaguars and Rolls Royce. I have bought a Silver Shadow and the comparison is vaild.

The facebook page about this and other P5,P5b cars is here.


Poor quality parts and spares.

The original servo was faulty but the non genuine Lockheed ones often sold on ebay with other cheap chinese made spares have a poor reputation. It was rebuilt with all new seals, the rear and master cylinders were also overhauled. I sourced English made,imperial sized kits I have some if anyone wishes to go the same route with theirs.

The master cylinder is 7/8 inch dia,Land Rover or P5 units are similar and often passed off as P5b but the smaller (3/4) bore means longer pedal travel. The rear cylinders are 3/4 inch bore and fixed by two bolts,P5 rear wheel cylinders are similar but held by three bolts .The P5 series have different servos and the earliest P5s have drum brakes all round


Rear spring mounting rot.

A weak point on these cars is the section around the rear spring 'Y' or 'mountings.This corrosion was localised and hidden by the original factory applied sealer which was thick and very hard. By removing the exhaust (which was relatively new and easy to remove) and the spare wheel carrier,access to the chassis section was improved and a new section was welded in place. The rear mounts can be damaged if the axle is allowed to hang,better to use a jack under it.

The Rover P5 rear spring shackle is a common place for corrosion.

Inner sill rust and door post rot on P5B.


The front and rear inner wings where serious rot is often a problem on the P5 series were sound,it seems the outer wings had been removed and replaced at some time and the inners repaired to a good standard.

There were some pin holes and some minor corrosion in the inner sills and door posts at the front on both sides. Hidden under the stainless steel trims, this rust would not normally be noticed as MOT testers are not allowed to dismantle or remove parts..The finished repair plate was covered by the stainless steel sill covers but water now couldn't get into the sills from inside. (Below right)

Plate to repair front door post.

A cardboard pattern was used to make a small welded and shaped section to replace the corroded area The floor was quite good,mainly still showing the original paint with only slight surface rust in a few places


Welded repair to Rover P5b front door post.

The plate was welded in place then painted and Eureka fluid film sprayed into the sill space.


Water leaks and unobtainable hoses.


Repairing heater hose bend with plastic insert.

The heater hoses under the bonnet are short,right angled,difficult to obtain and expensive. I used 5/8 heater hose and inserted 15mm domestic hot water plastic pipe cut as above that stops the hose kinking when bent sharply.

Heater hose with ninety degree bend fitted behind the V8 engine of P5b Rover

The hose can be bent without collapsing.other people have made the same hoses using standard plumbers bends in copper with short connecting pipes.

The cooling system on these cars have to be refilled with the engine running and hot (cap off) this is the only way to vent air out of the heater circuits.


The downshift cable on a P5b has to be accurately adjusted to prevcent lumpy shifting.

Borg Warner type 35 kickdown cable adjustment.

The linkage between the twin SU carbs and the kick down cable for the BW35  autobox has been altered,possibly as a result of the engine and/or gearbox being changed in the past.The change down when coming to rest was rather harsh with a distinct thud.A lumpy downchange is common on many vehicles fitted with the Borg Warner type BW35 but can be lessened by adjustment to the kick down cable and to the tick over speed.The cross linkage needed altering to allow the kick down to operate and still allow the box to change down smoothly on coming to a stop.The kick down cable has a crimped stop on it,I found it necessary to move this stop a couple of mm to obtain a smooth down change when coming to a halt. The earlier six cylinder P5 series had a different gearbox (DG) to the V8 versions.(BW35)

If the filter on the BW35 box on these cars becomes blocked it can make a whirring noise. In some cases it sounds very like the 'lollipop stick in the bicycle wheel' that kids enjoyed years ago. This happened to this car,when the gearbox sump was dropped a totally blocked filter was revealed,some of the blockage fell off as it was taken off, the filter is a fine mesh as this was undamaged the filter was cleaned and refitted.

The filter from a Borg Warner type 35 automatic gearbox clogged with dirt.

The throttle butterfly on a Rover P5b.These V8 engines have two SU carburettors.

The SU carburettors have a sprung loaded valve that is designed to open under full vacuum (overrun) and weaken the mixture. One of the early attempts at emission control. These valves can leak as the spring weakens or the valves become worn. As the picture shows they also intrude into the carburettor throat and must upset the air flow and act as a restriction at large throttle openings.

The valve was dismantled and the spring discarded.

The remaining parts of the valve were peined over to lock into the throttle plate and sealed with solder,the throttle plates were then replaced in the carbs and the securing screws peined over so that they cannot vibrate loose. There is now less of an obstruction in the carburettor throats.

A cold air intake reduced intake noise.In theorey it should increase power at the expense of smooth running when cold.

The rover P5bs use these Rostyle wheels.They are chrome plated and then part black painted.


Rostyle wheels on the P5b.

The wheels on the P5b series are Rostyle chrome plated wheels similar to those fitted to some sporty Fords and other vehicles.Rechroming these is very expensive. Luckily the car came with a spare set of wheels and tyres,the tyres were C rated (commercial) and of no real use to the car but the wheels were in very good condition. The only really bad one was the spare which had languished under the boot floor and was pitted in a few places with rust.

Changing the tyres was quite simple. The tyres themselves were tubed type with inner tubes. The beads were reasonably easy to break and the tyres,heavily lubricated with a tyre fitting wax slid off the rims with little effort by hand. Two tubes had very slight leaks and were replaced with new,the tyres and tubes being coated with talcum powder to lubricate so they could slide into position as they were inflated.

Tyre removal from Rostyle chrome wheels.

 Fuse box and pitting and corrosion on Mazak castings.

The fuse box on the late P5 series cars is a long black plastic Lucas unit with the connections from wires to each end of the fuses rivetted through the plastic.These eventually become loose and result in bad connections and unreliable electrics.The plastic is held by a single screw at each end and can crack when tightened.I bonded the cracked fuse box onto a sheet of fibre glass and re soldered the connections.

Changing a bulb in a front indicator revealed both lamps were badly corroded.Many cars of the 60s and 70s have fittings made out of this mazak like material which corrodes rapidly and is vitually impossible to repair.

Corroded Rover sidelight Mazak metal crumbles away quickly

Corrosion on the indicator of a rover p5b


Because the corrosion had rotted out the fixing bolts,the front indicators had been glued, complete with the grotty remains of the rubber covers straight to the body.The indicator lamps were removed and repaired temporarily with a two pack epoxy,later I was able to buy some better replacements.Even corroded lamps are worth keeping as spares,as little is available new now for these big cars


The rubber covers and gaskets for the indicator lamps are sometimes available but are in my opinion overpriced.From some thick rubber industrial floor covering and a thick inner tube I made a pair of covers.

I used an industrial glue and sealer and the finished articles are very strong and seal the back of the lamps against water getting in.

The p5b underbonnet blanket.

The blanket which insulates the underneath of the bonnet from engine heat was missing,. A new one was made from black cotton with a fire resistant insulating wadding between. The cotton was made fire resistant by soaking in a boric acid/borax solution.When dried it was fitted with new wires to hold it in place under the bonnet.

Stopping draughts round the door seals.


The door seal around the sliding window was hard and eventually broke up totally when on a hot day it stuck to the door aperture.The remains of the old seal are below a new length of rubber which although a different shape would seal and locate in the door fram in the same way as the original.The new seal was cut and its ends cut at an angle to meet in a mitre on the corners.

The new rubbers were glued together with a strong contact glue. They provide a nice tight seal all round the window frame without making the door hard to close.

Making new door seals on Rover P5b front doors.

A new door seal was made for the trailing part on the drivers door.The original had perished although the rest seem in reasonable order.

The replacement seal was made by bonding two commercially available sections together (as at bottom of picture) to achieve the required shape.It seems the secret to gluing rubber door seals etc is to roughen then slightly with sandpaper and then clean them with thinners and use a decent contact adhesive.

Rover door seals.These harden with age.

The new seal seems to fit well over the door lock aperture and the door closed with a satisfying thud. Since these pictures were taken I renewed the front seals with a set from J.Wadhams.

Hand made door seals on the front door of a P5b.

Warped hardboard door cards on a rover p5

 The door cards are hardboard and over the years damp and water had distorted them. the passenger side was warped on the top corner.

When fitted there was an obvious gap and laid flat the curve in the old hardboard was apparent.

Care fully unpicking the staples and rolling back the vinyl (after soaking with WD40 to soften it) the door card was opened up. The top piece which was warped is a seperate section stapled to the main card.The staples were removed,and the seperate section peeled off and used as a pattern for a replacement made from thin plywood.

Part of a warped Rover door card being repaired.

The ply copy replaced the warped piece and this was glued and stapled to the backing. The foam and leathercloth were re attached and the completed door card now fits flat to the door.

A restored rover door card,forty years old but still all the original materials.

After resewing broken stitching and cleaning the vinyl door cards looked well for materials that are now over fourty years old.

The map pockets on the bottom of the doors were trimmed with a carpet like material and new hinges and elastic straps made.The wooden trim on top repaired where they had cracked,stained and varnished.

Furflex trim on a Rover P5,this gives a neat edge to the door frame and cuts drafts.

Replacing furflex door trim.

Like many older cars the rover has a plush covered trim round the doors.

Made by wrapping a cloth around a soft rubber tube this is called furflex.

On the rover the trim is secured by tacks or staples to a medium hard rubber insert that is clipped around the door frame.

Taking off the centre pillar trim enables the old trim to be removed along with the staples fxing it.

If the trim is fitted carefully it gives a neat finish between the doors and the fixed vinyl trim and presumably helps lessen draughts.


The furflex around the front edge of the front doors requires both extra trim and the wooden ends of the dash panel to be removed .

A common problem on the P5 and P5b Rovers is water coming in from the front screen rubbers and rotting the wood ends (fillets) of the dashboard. The varnish goes white and the wood softens. The furflex trim was renewed and is attached by tacks to the hard rubber strip inside the door frame. To fit it the drivers side wood panel was removed and apart from from some minor corrosion treated with Fluid film it seems OK. The screws are well hidden and one securing nut (5/16 inch AF) behind the dash is very awkward to remove,the stud for the nut goes through the hole seen above and to the left of the handbrake lever.


Damp damage caused by leaks from the windscreen rubbers on a rover p5.

The plywood fillet had delaminated and was weak .A thin piece of ply was glued to the rear of the damaged part after peeling off the damaged outer layers.The brackets were refitted with new screws and glue.

Behind the panel the soundproofing was reglued after treating the metal to discourage further rusting..

The rear bumper was changed for a new stainless steel one. Complete with stainless steel over riders the bumper was fitted to the existing supports after they had been straightened and cleaned.

The top one in the picture is the old one,although it looks OK it was pitted and scratched and very thin on the ends where these bumpers are very prone to rusting.

A stainless steel new bumper on a Rover P5 being compared to the chrome plated original.

The rather imposing grille and headlamps on a Rover Pb5.

The grille and front bumper were reasonable,but some better ones turned up later on ebay and by swapping over the best bits the front looked quite presentable.The front bumper is actually three seperate sections and the grill surrounds and the centre slats can be dismantled like a sort of giant meccano set.Some of the rivets holding the grille together had corroded and were renewed.The grilles on P5 and later P5b are interchangeable but the earlier cars have a hole for a starting handle at the base.

The front bumper has since been replaced with a stainless steel version.

The bonnet gaps on a rover P5 are difficult to set especially with new front wings fitted.

Bonnet gaps 

After adjusting the bonnet hinges many times with no real success I finally loosened the bolts holding the wings and by jacking the wings upwards and persuading the wings to align closer to the bonnet with a very heavy rubber mallet the gaps became more acceptable.Apparently the replacement wings for these cars are not exactly the same shape as the originals,but I also understand that when these cars were made it wasn't unusual for the doors,bonnets and boots to be fettled by hand to obtain decent panel gaps.

The anti roll bar bushes were worn and swelled,oil had soaked in over the years and softened them. New ones are available but £25 for what are only a couple of small bits of rubber seems a bit steep. After some searching I found some for a modern vehicle (Land Rover) that are heavy duty and fit after a bit of modification. They seem to work as well,if anything better than the originals and only cost £3. The original parts could still be retro fitted if required.

Rover P5 anti roll bushes.These bolt to the chassis and prevent excessive lean on corners.

Rover P5 track rod end,new ones no longer have grease nipples.

The boots for two of the ball joints /track rod ends had split. The joints were OK apart from one where the grease had dried out. I replaced all the rubber boots and gaiters. These are obtainable as generic parts in various sizes.The dried out joint was compressed in the vice and grease pushed in the gaps,moving the joint round left it feeling much easier and smoother.Some of the joints (presumably the older ones) had grease nipples ..

The anti roll bar has been cleaned and painted plus new mounts fitted.Old flaking underseal has been scraped off and any rust treated with a rust convertor then primer and underseal. .I coated the underside where the original underseal was still sound with thinned Eureka Fluif film to seal any hairline cracks.

The crossmembers were sound but loose paint was removed and they were painted black as were the tie rods etc,all split pins and locking washers were replaced.

The rubbers on the anti roll hard were worn and hard ,the metal uprights were corroded and worn thin .The rubbers were replaced by a set intended for a Rover P4.

The anti roll bar link components of a rover p5

The ends of the links were ground and filed down to remove the wear and rust marks.

A sleeve of steel tubing was slid over and made a tight fit on the worn section of the links,the edges tapered off and it was welded to the pins and the UNF thread on the ends cleaned up.


Improving the interior.


The pins were cleaned up and coated with an anti rust treatment,using brake fluid as a lubricant the bottom bushes were fitted and the link pins assembled back on the car

Rover P5B door card repair.

The interior was tatty but nothing was missing and new carpets had been fitted.The door cards were poor,like most old cars they'd been affected by damp but they were repairable,the seats were cracked and the stitching had come away.Some of the seams had opened but the seats were still repairable,considering the cars age they had survived quite well.

Rover v8 front seat.These are expensive to restore or recover

The foam in the drivers seat had disintegrated.The leather was wrinkled and seams were splitting.Considering their age and the length of time the car had been stored they had survived reasonably well.


Seat foam disintegrating

The vehicle came with some rough spare seats and some odd trim parts and I bought two more front seats from Ebay.These were dismantled and some of the leather panels swapped over.The seats are suprisingly heavy


Repairing reclining seats..

The reclining mechanism in the seats from Ebay was broken and the seats had been welded in a fixed position.The reclining mechanism was repaired using parts from yet another scrap seat.The leather seat covers are held by small metal clips and small pointed tags formed by cut outs in the metal seat frames.


Rover p5b interior finished.

The seat had a few odd creases but is more comfortable than before.It still needed the leather softening and feeding and the cracks in the leather filling.The carpets didn't fit well and I retrimmed and edged them a couple of times

The console is made of a hardboard type material. This had got damp and started to rot. New pieces were made out of MDF.The soundproofing over the tunnel was renewed and extra sound proofing material added in places.


The gear lever selector plate was repaired and the padding under the vinyl cover replaced.


.

The gear lever brush type draught excluder was also replaced with a cut down domestic door seal.

The seats had been painted which sealed them and this was removed with thinners. They also had some damage which after cleaning off the paint and old polish was filled with a water based putty.The same putty was rubbed in any deep cracks.The seats were then dyed using very light coats built up over a period of some days.I used a kit from Woolies which is water based.


Later I renewed the foam in both the front and back seats.

I used a high density foam and stretching the leather and vinyl covers over the new foam removed almost all the creases and wrinkles.

The rear seat bases were refurbished using three inch thick reconstituted foam. The seats are crease free and approx an inch thicker than before removing the gap between them and the seat backs.

The interior wood was revarnished and constant feeding of the leather has left the seats softer.

The stainless steel kick plates and the panels around the seat base and mechanism were polished after the scratches were ground ou. The screw holes fixing the kick plates can be used for spraying in fluids to kill rust or slow down new corrosion.


 Morris Golden Film 20W/50 replaced the old engine oil.It gave a slightly higher reading on the oil pressure gauge,these engines can have a low oil pressure at tickover with the oil light sometimes flickering especially if the engine is hot.It isn't considered a fault as long as the light goes out when driving.The oil gauges are electrically operated and not known for accuracy.


V8 engine in Rover P5B.

The twin SU carb set up has a manual choke conversion already fitted.The brake fluid level light stayed on,it uses a cork float that after forty odd years had soaked up enough brake fluid so that it only just floated.It was replaced with the cork from a champagne bottle. Later I found a cap and switch from a Datsun that fitted and works.

Later the air filter,intakes and rocker covers were painted .A small catch tank was added to the radiator overflow.

I took the rover to a small car show and meeting in Yarmouth.My old London black cab came along as back up but wasn't needed.I'm suprised at the interest in the old rover a lot of people seem to genuinely have some sort of affection for them.

Front suspension swivels,adjust and grease.

The suspension top swivels on a P5 or P5b are now long obsolete and virtually irreplaceable.Early ones had grease nipples,the later models are 'sealed for life'.The grease inside can dry out or be lost if the rubber boot is damaged.

If the joint has no play dismantling starts by releasing the peined over (staked) areas of the brass plug with a fine punch and removing the brass plug (3/4 inch AF socket).The brass is easily damaged,a six point impact type socket is less likely to round off the corners.

Under the brass plug is a washer and plastic bush.These should be checked for wear or damage,if they are the joint must be replaced or refurbished.The joint can have fresh grease smeared on the ball and plastic washer and the plug replaced in the same position as before.If the joint has some play but is undamaged it should be removed from the stub axle and the brass plug tightened to leave only slight free play in the assembly before it is staked back in place.

The bottom swivel joint rubbers were damaged and torn. I replaced these with ball joint rubbers after greasing the exposed parts of the joint. The bottom suspension arms MUST be supported securely under the ball joint housing so that the weight of the front of the vehicle is on these supports when removing the fixing nuts on these joints or the torsion bar will unwind with considerable force. The procedure is covered in a manual and must be followed.

Repair Rover P5 back bumper corrosion.

The original rear bumper was rotten P5 rear bumpers corrode badly on their ends. I found a better one but decided to see if the original could be repaired.The dents were knocked out but parts had rusted through completely.The holed and thin metal was cut out and a metal plate accurately cut to fill the hole.The chrome was removed round the edges and the plate welded in place.The bumper supports had rusted out and new ones were made from steel plate with captive nuts welded on these were welded on the back of the bumper.

There are some pictures of this here

The engine ran unevenly and a timing light showed that the timing was all over the place. This was traced to wear in the pivot that allows the points to move under the influence of the vacuum advance mechanism. The pivot was replaced by a bolt and a piece of steel tube with a spring holding the base place steady whilst still allowing rotational movement.

The points for a later distributor (the type with the concentric plate holding the points,the plate on the earlier dizzy is triangular) fitted if the locating pin is ground off and the adjustment slot enlarged),these cost around six pounds and are easier to obtain..

Sediment inside the thermostat housing on Rover V8.

The water pump had a slight leak from the gland,and the engine ran hot.The thermostat housing was full of a jelly like corrosion,only to be expected in a car with so many aluminium castings that had sat for a long time.The radiator was choked and was removed and washed through with a weak acid solution,this was repeated several times and the radiator then back flushed.

Filling the cooling system on these cars has to be done with the engine hot and ticking over at a reasonably fast speed.The heater taps are turned on and off a few times,otherwise air locks in the heaters can cause overheating through poor coolant circulation.The radiator should be filled hot and on cooling will have dropped down the filler neck by a couple of inches.The system must have antifreeze in it at all times to prevent corrosion of the alloy parts.

Removing broken water pump stud with grips.

Rover V8 water pump removal

Some of the smaller bolts holding the water pump sheared off.With the pump and the radiator top mounts removed access was easier and after warming the studs with a blow torch and a soak in Plus Gas the remains were unscrewed.The new bolts were fitted after coating them with copper based grease as an anti seize assembly compound.The threads on the four long bolts are coated with a non setting sealer.The later Rover P5bs use UNF and UNC nuts and bolts extensively so an imperial AF tool kit is essential.

The AC mechanical fuel pump on these engines are no longer made and the internals hard to find and expensive.I have managed to obtain a small supply of overhaul kits,diaphram,valves,seals and gaskets etc.

 The rear shock absorbers were Spax Gas adjustable types and after freeing the adjusters they were set to a soft setting which improved the ride,making it less jerky at the expense of a bit of extra roll on cornering,The brake pipes,one of which can be seen in front of the shock absorber were replaced with non corroding copper versions.


p5b rear screen rubber

Removing rusted rear screen clips on rover p5b..


Rover P5 front and back screen rubbers

Both front and rear screens on a P5B are renowned for leaking and the rubbers are a time consuming and difficult job to replace,there is some debate as to wether the new rubbers available fit correctly.Most people who have replaced them seem to use several tins of dumdum (now discontinued for some weird health and safety ruling) or similar to help seal them.The coupe and saloon have completely different screens,windows and door frames.

The front screen rubbers are reasonable but the chrome strip on the rear one was loose and the rubber in poor condition.Removing the strip revealed rusted out fixing clips but one was undamaged and served as a pattern to make up some new ones in stainless steel.The strip was then replaced on a bed of sealing compound.as a temporary repair the damaged rubber was covered with 'Liquid Rubber' a product more commonly used for roof repair.A leak into the nearside of the boot took some time to trace,front and rear screen leaks are a common problem on a lot of these big Rovers.This one was coming in on one side of the top chromed strip then running all round the inside before emerging under the filler cap and then into the boot.

The rear door cards were in pretty good order but taken off and dried out.A few clips were rusted and replaced and the interior of the doors sprayed with Eureka fluid film anti corrosion treatment.The doors had been repaired in the past but had only a couple of holes that had been filled,the window mechanism and locks were oiled and the trim cards refitted. Cellulose paint in the original colours Burnt Grey and Silver Birch was available and both proved reasonable matches for the paint already on it,the rear of the boot had some pin holes but the body is in good sound condition other than a few minor blemishes.

Rover p5b door with door card removed to repair lock.

Rover p5b coupe winder.


Window winders and regulators.

Broken window winders on the P5 serias are a common fault,they aren't very strong and the gears wear quickly.The winder on the drivers door had been repaired with welds and pop rivets.It eventually broke again and the glass ended up in the bottom of the door.I repaired it with steel rivets and a blob of weld.The winder fitted is probably not the correct unit (probably from a rear door) as it fouled the door when the window was lowered,I cut off some of the teeth on the opposite side to the window arm.Stocks of replacement front winders are hard to find in good condition,the rear units are used less often and are often fitted in front doors when the originals fail.

The window winding mechanism is a real tussle to get out of the doors even with the frame removed.

This is a front wheel bearing that overheated on a trip.The outer race has cracked,the picture doesn't show it but the race was very badly pitted.The race was hard to remove but a new replacement simply dropped in,this proved the hub was damaged,a temporary repair was made with Loctite and using a punch to 'dimple' the bearing housing but the entire hub was later replaced.

The outer race and roller cage were of different makes and the sizing was different (the rollers being too wide) Prior to getting hot the bearing turned quietly and without play.Just goes to show that you can't be too carefull.

The underside of the rover and the box sections and sills etc were treated with the car up on some very heavy wooden ramps.

I used both the black Waxoyl and Fluid Film.The handbrake linkage was coated in grease and the rear springs were greased and then wrapped in a heavy black PVC secured with strong cable ties.


Rover on home made heavy duty ramps.

The rear spring Y mounts.

The rear springs are supported at the back end of these cars by a rubber Y shaped mount.This is unique to the Rover P5 series and is called a contrasonic mounting.These perish and crack and the spring can become detached at the rear if the car is jacked up with the rear wheels hanging free. I removed one mount to make a replacement using engine mountings but these proved too solid.

As the rear springs settle on a P5 they distort the rear contrasonic mountings and subject them to shear forces. Although the rear springs had only settled slightly and still had positive camber they were forcing the Y mounts out of shape. I modified a new set of mounts with high tensile bolts and the original mounting holes elongated for adjustment. The bolts go through a plate that can slide inside the mount.Early P5s use BSW/BSW fittings the later P5bs use UNF/UNC.

The rear Y mounts on the rover P5 series rear springs.

Over twenty five years ago this was me,realising the three litre rover P5 I'd bought was beyond my capabilities to repair,(but I wish now I'd salted some of its spares away).

The inner wings on this car were rotted both front and rear and the corrosion had spread well into the body structure,

I seem to remember the car cost me about fifty pounds,happy days! This was one of the early cars and driving it convinced me that one day I'd buy a half decent one. Other things got in the way and I had to wait over two decades.